AstroDMx Capture’s User Interface
Overview
This section is intended to be an overview of the user interface. The user should read this section to form a foundation for the main sections that show exactly how to use the new functionality of AstroDMx Capture version 2.
The main user interface (UI) of AstroDMx Capture is split into five logical and discrete groups.
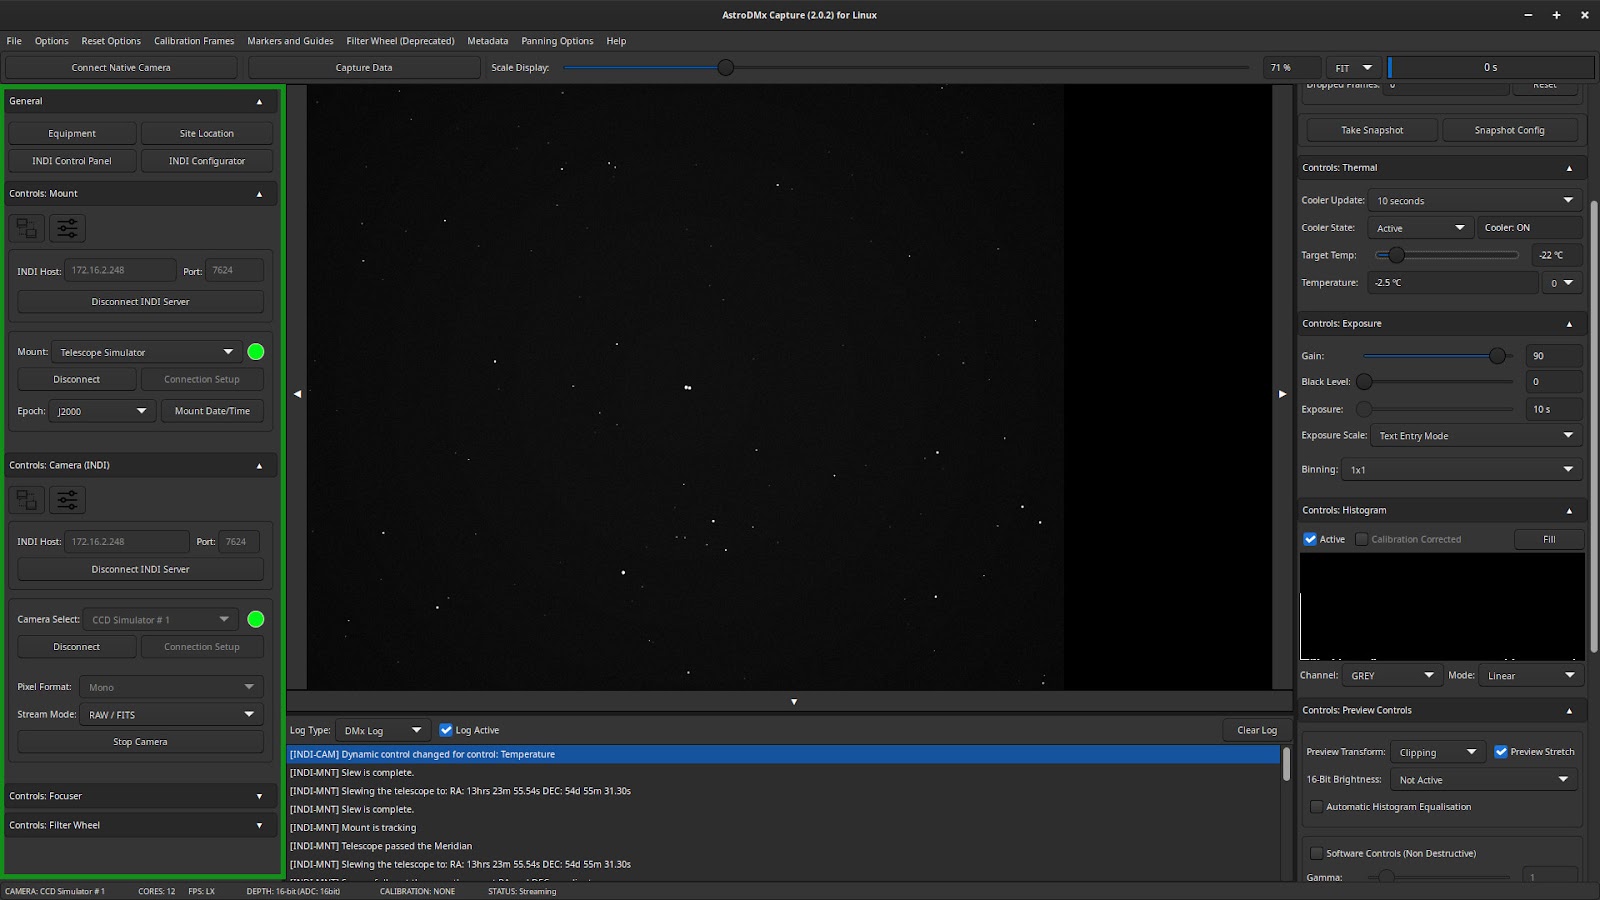
The screenshot below shows these five areas coloured, red, green, purple, blue and yellow. The help section below will briefly discuss each of these areas using this colour coding system.

The user interface has a number of standard controls that are seen throughout the application.
A notable example of this is the arrows which appear at the top of control groups. These arrows can be used to open or close a control group, this is useful to reduce “clutter” which makes it easier to find controls that are currently of interest while masking those that are not currently relevant.
Download AstroDMx Capture from the main downloads sections of this website.
General Control Area (Red)
This area includes various drop-down menus and basic camera controls.

The first line holds the drop-down menus. The menus are; File, Options, Reset Options, Markers and Guides, Filter Wheel, Metadata, Panning Options and Help. The second line includes basic camera controls. These include camera, connection, capture control, display scaling and exposure progress feedback.
These controls are identical to previous versions of AstroDMx Capture and so will not be discussed in this documentation.
Advanced Controls (Green)
This section is the main control area for the advanced functionality and it is split into five subsections. With the exception of the “General” control group, each subsection is divided into two discrete groups.
The first group holds the device connection controls and the second holds the functionality for controlling the device. At the top of each subsection are two buttons which are used to change the mode from connection controls to device controls and back.

The screenshot above shows these two buttons. The left hand button exposes the connection controls and the right shows the device controls. This concept is consistent throughout the device controls discussed in this part of the documentation.
In addition to this, each control group has an LED which shows three colours. Red means that the device is not connected, flashing orange means that a device is trying to connect and green means the device has successfully connected.
General Control Group
The General group has four buttons. These four buttons are described in more detail below.
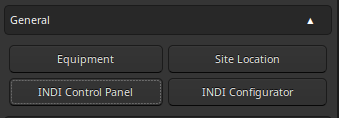
- Equipment
- Site Location
- INDI Control Panel
- INDI Configurator
Equipment

This UI is used to maintain an equipment database. Information about the user’s telescopes can be added to this window and once added, various pieces of information are automatically calculated. The primary intention of this information is to provide a helper for calculating field of view data when using the astrometry functionality of AstroDMx.
If entered, this information is also appended to the capture log file.
Site Location

This UI is used to enter the user’s geographic location. It is possible to have multiple locations defined and, if a mount is connected, this information can be used to set the mount’s location directly to the hand controller.
The geographical information defined here is also used to calculate the rise, set and transit times of Astronomical objects and is appended to the capture log file.
INDI Configurator

This UI is used to start/stop and configure an INDI server. This can be done for a locally installed INDI server (for Linux and macOS) or a remote server (all platforms). If this is done on a remote server, then that server must have SSH enabled.
INDI Control Panel

Most of the functionality for INDI drivers are implemented elsewhere in more convenient locations throughout the application’s UI. However, as there are so many different INDI devices, it is not possible to implement every control that a driver might offer. This UI catches all functionality offered by a specific driver and should allow control of functionality not directly implemented elsewhere.
Controls: Mount

This UI provides functionality to connect to an INDI mount device and to set the mount’s date and time. There is also a control to change the epoch for celestial coordinates. Currently, only J2000 is implemented therefore it is vital to use J2000 celestial coordinates throughout the use of this application.
Clicking the right hand button (highlighted in red) will expose the mount controls. The mount control UI is the main area used to control telescope mounts. The mount control UI looks like the following.
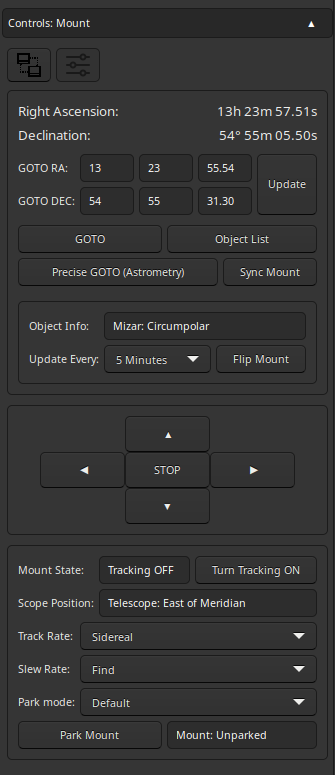
This UI will be discussed in detail in the walk-through documentation. To summarise, it allows the user to perform GOTOs, nudge the mount, set tracking and slew rates, shows information about the selected astronomical object, allows the mount to be parked/unparked and performs meridian flips when needed.
Controls: Camera (INDI)
This subsection is the main group to control INDI cameras. It is divided into two sections. The first section holds controls intended to connect to an INDI camera, set the pixel format, configure the streaming mode and start a camera.
As with the mount device (detailed above), this UI has two buttons at the top which allow the user to change the mode from connection control to the camera control and back.

The screenshot above shows the INDI camera connection UI. In this example, a PlayerOne camera is being used. Clicking the button for the camera controls exposes the following UI.
It will be noticed that INDI refers to cameras as CCD devices, even CMOS devices such as the Player One camera shown above.
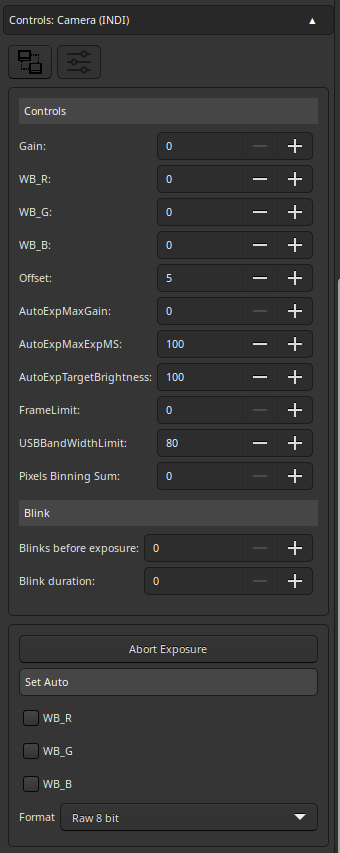
As can be seen in the screenshot, it is possible to control all the usual camera parameters, such as gain, white balance and offset as well as many others without having to visit the INDI Control Panel. The exact layout of this UI is dependent upon the specifications of the connected camera. All controls shown here can also be found in the INDI Control Panel.
The exposure and cooling controls are located on the right hand side of the UI (highlighted in blue on the main screenshot) just as they are for natively connected cameras. In addition to this, gain will also show on the right hand side of the main UI but only for certain INDI camera drivers.
Controls: Focuser

This subsection is the main group to control INDI focuser devices. As with the previous INDI devices that have been discussed, It is divided into two sections. The first section holds controls intended to connect to an INDI focuser and the second holds the actual focuser controls.
Pressing the usual button to change the mode reveals the following UI.
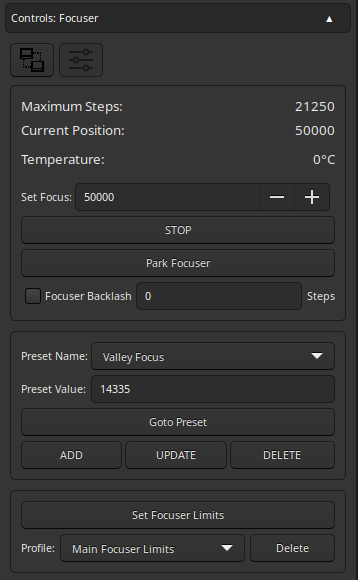
The specifics of this functionality will be discussed later. To summarise, this UI shows the maximum steps configured for the focuser, the current position, current temperature, and provides a method to stop the focuser’s movement. In addition to this, focus positions can be saved and focuser limits can be set.
Controls: Filter Wheel

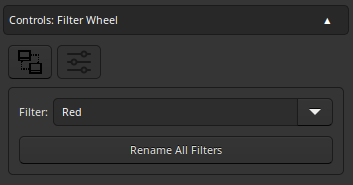
This subsection is the main group to control INDI filter wheel devices. As with the previous INDI devices that have been discussed, It is divided into two sections. The first section holds controls intended to connect to an INDI filter wheel and the second holds the actual filter wheel controls.
Filters can be renamed by clicking the “Rename All Filters” button or simply typing a new name in the Filter drop-down and then pressing enter.
Log Window (Yellow)


The log window outputs important information about events that occur throughout the run cycle of the application. Information about frames captured, INDI device messages and error messages may appear here. This log can be configured to show INDI server messages, AstroDMx messages or a combination of the two.
Camera Controls (Blue)
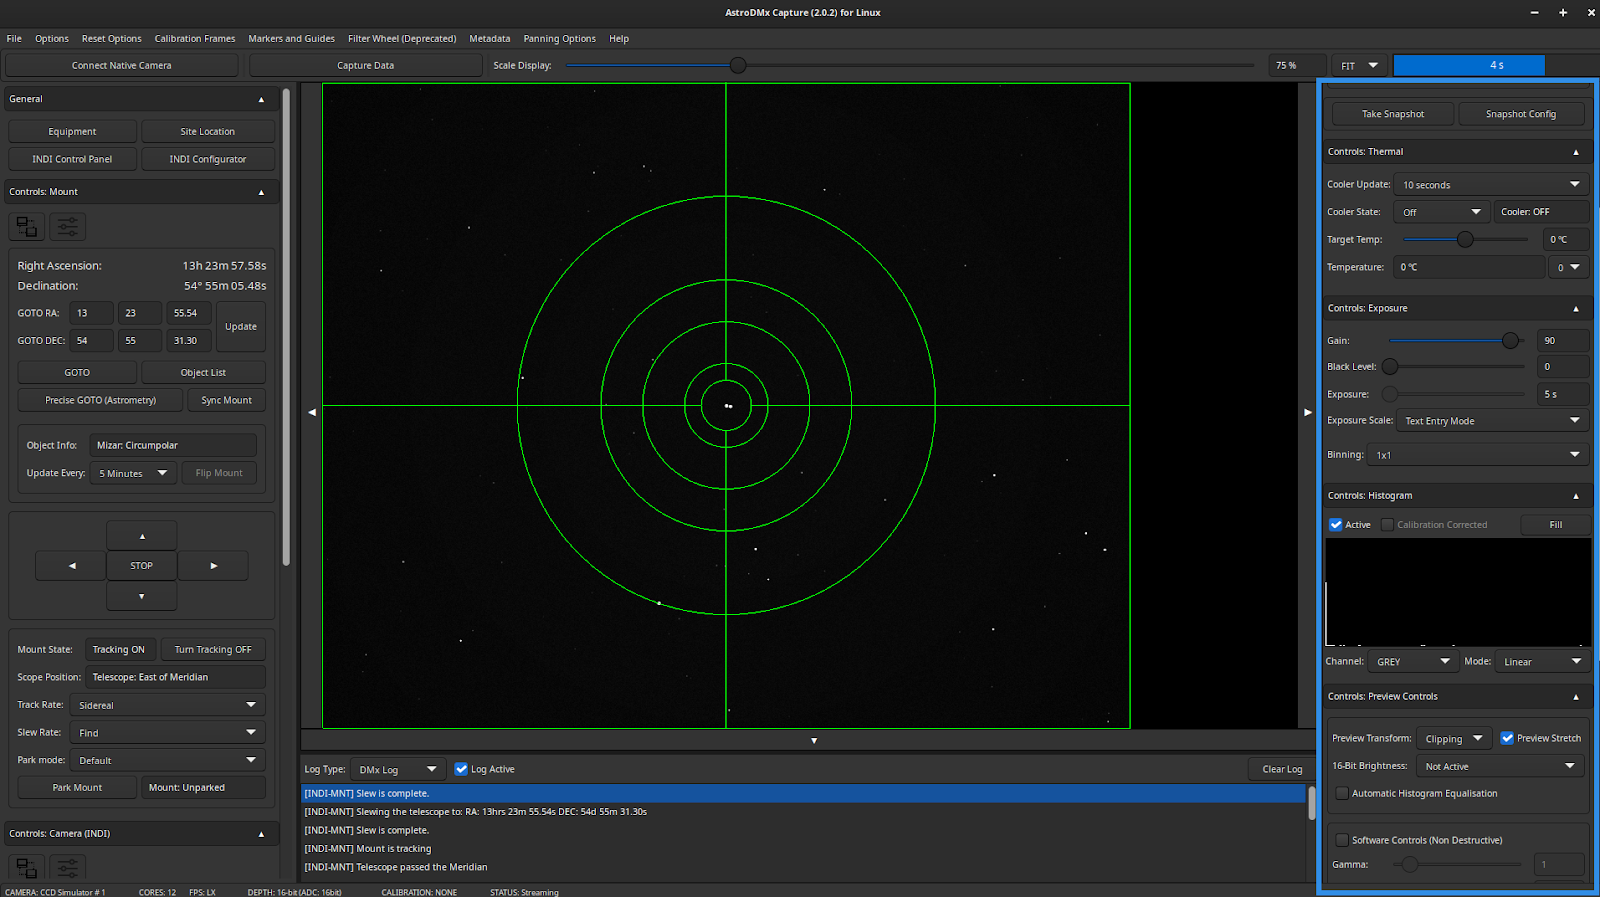
The right hand controls are for the main camera controls. The controls include all the major camera controls, histogram, 16-bit transforms etc.
This section of AstroDMx Capture is the same as for previous versions and so will not be detailed in this section.